
Uploading Your Print Book to Createspace

To publish print books through Createspace.com, you will first need to set up a Createspace account. Once established, the Createspace dashboard will be your portal for uploading your books to go into print and editing existing books. It is also where you will check your sales and run royalty reports for specific time periods.
The dashboard is very simple to navigate. First, click on “Add New Title.”

That will open the screen to enter specific information about your book.
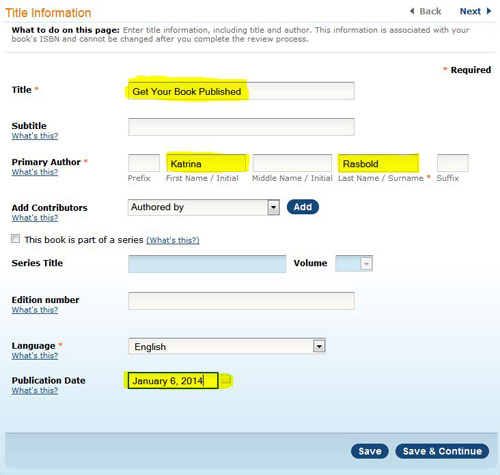
Once you have filled in the blanks, click on “Save & Continue.”
Next, the program will ask about an ISBN (International Standard Book Number). An ISBN is a cataloging number that is specific to your book, sort of like its social security number. You cannot change this number once it is assigned to that particular book. Your ISBN is assigned to your PRINT book. Ebooks have their own cataloging process that happens seamlessly with the uploading process through Kindle Direct Publishing.
You can pay for an ISBN or take one of the free ones from Createspace. I am a tightwad, so I take the free one and have seen no benefit to the paid ones or detriment from the free ones.
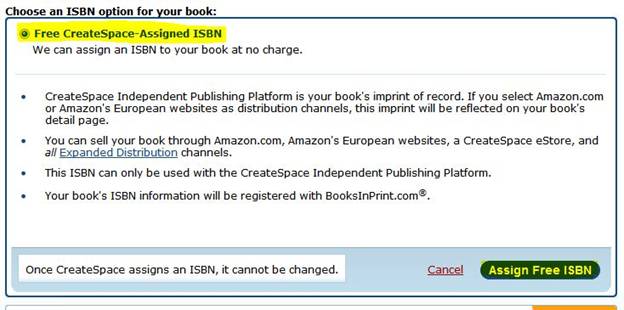
Click on “Assign Free ISBN” this screen will appear:
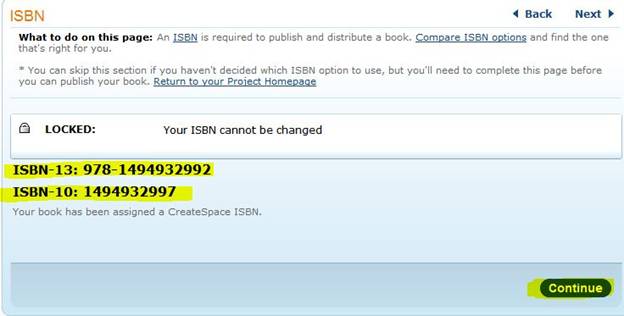
Copy the ISBNs down and paste them onto your copyright page.
When you click “Continue” from the ISBN assignment, you will arrive at this screen, where all sorts of magical things happen:
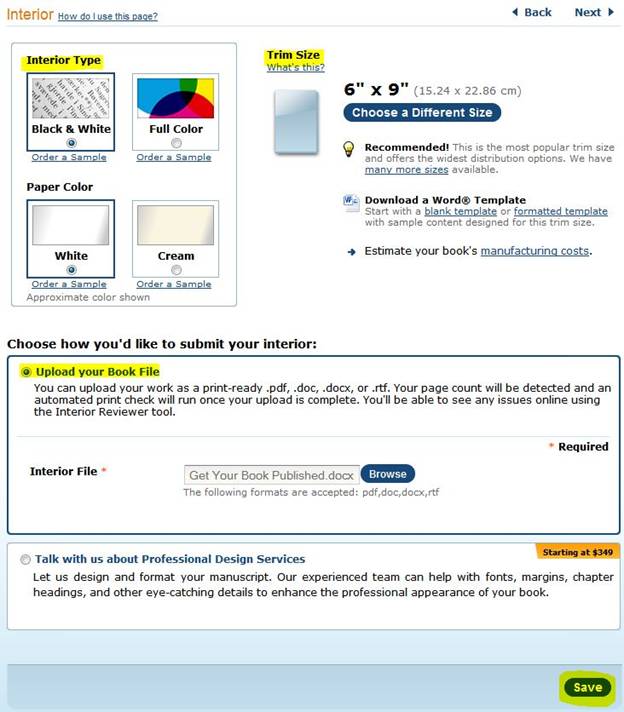
Here, you will choose your interior type. Print books will be black and white inside (color for the cover) unless you choose a full color print. Be prepared because full color print is VERY expensive. Choose your paper color (white or cream) and your trim size. Make sure your trim size matches the size you used on your manuscript.
Next, you will upload your book file. Click on “Browse” and navigate to your file. A big difference between Kindle Direct Publishing and Createspace is that Createspace does NOT want a zip file. They want your raw MS Word .doc or .docx file. Open Office can also create these types of files. You may submit your manuscript file to Createspace as a PDF document. I have often found that when I cannot get a successful upload with an MS Word file, I can with an MS Word generated PDF document.
Make certain that you can find your MS Word or Open Office manuscript file easily once it is complete and formatted as previous described. Click on the blue “Browse” button on the “Interior File” line and navigate to your manuscript document. After you have selected it, click on “Save.”
The book will begin the upload process. Once the file uploads, it will go through an “Automated Print Check” process to look for immediate problems.
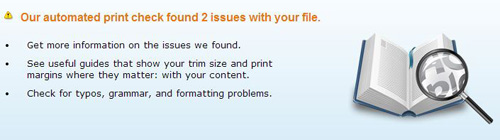
After it runs, the program will let you know how many issues it found, if any. Click on the blue button that says “Launch Interior Review” to preview your book and indentify the errors. I do not ever recommend that you “Skip Interior Review,” even though it gives you the option to do so.
When the Interior Review launches, click on “Get Started” and the program will take you to the review.
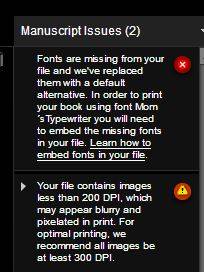
In the upper right corner of the reviewer, you will see the issues listed like this:
It can be frustrating to receive multiple error messages, but it truly is an effort to help you provide a quality product ultimately.
In the example above, we are told that there is a problem with the fonts in the books and that they should be embedded. This means that a font you have used is non-traditional and should be provided for the printer.
There is a link to tell you how to do that. Another option is simply to change the font. In this case, I intentionally used a non-traditional font so you could see that error.
The program also told us that images are less than 200 DPI. There is a right pointing arrow to the left of this issue identification. If you click on that arrow, it will open a list of book pages where these images can be found:
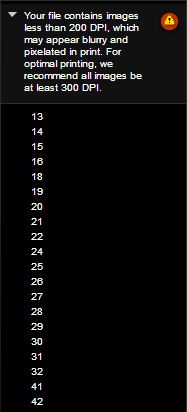
If this happens, you will need to adjust the dpi (Dots Per Inch) of each image affected in a photo editing program such as Adobe Photoshop. They are not kidding when they say that your image will look crappy in print if it is below 200 dpi. Even when you are looking at the image in the Interior Reviewer, you are still seeing it on a computer monitor which is far more forgiving than print.
If your file has no issues or errors, I still recommend looking through PAGE BY PAGE to the very end and making sure it looks appropriate and exactly how you want it to be. Once you are satisfied with the results, click to save and exit the reviewer. You may then “Go Back and Make Changes” or continue.
Next, you will be asked about your cover. In Chapter 13, we will go into more detail about the process of creating a cover. For now, we will discuss the uploading of the completed cover.
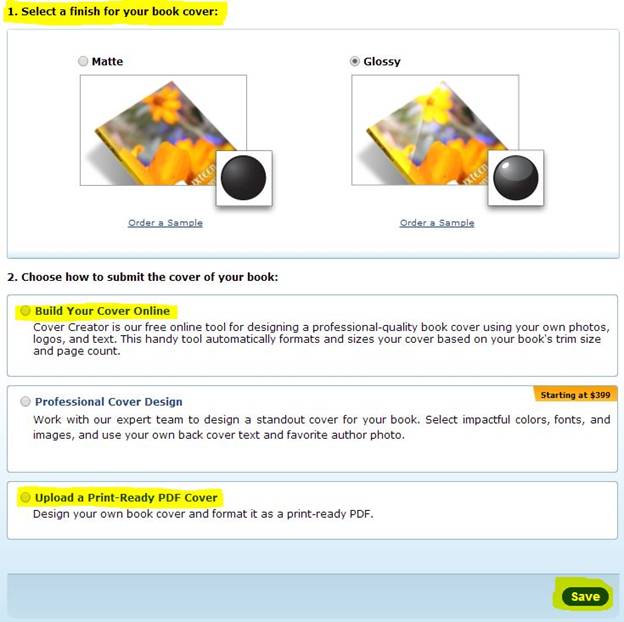
First, you will be asked to select a finish. Glossy is shiny and matte is not. This is strictly a matter of personal preference. Regardless, your cover will be of quality material, just like the covers of paperbacks in bookstores or libraries.
You may then go into the “Build Your Cover Online” function, pay someone a minimum of $399 to design your cover, or upload a cover you have created yourself.
Once your cover is uploaded, click “Save.”
Your cover will then submit to a similar automated approval process as your manuscript document went through.
Based on the results, you may now go back and make changes or choose to continue.
Once you are comfortable with the results, you may submit your files for review. This is an “eyes on” review process to make certain your cover and manuscript are properly formatted for print. Within approximately 72 hours, you will receive an email from Createspace either approving your project or identifying changes you need to make.
Please do not become discouraged if this takes several attempts. As I have said, there is a learning curve to this process and it takes time to learn how to reduce significantly the chances of your project being rejected. Take a breath. Take your time. Get it right.
Once your project is accepted by Createspace, you will need to see your book proof, set your price, and identify the channels through which you wish to distribute.
Proofing Your Book
There are three ways to proof your book: online, via a downloaded PDF, and through proof copies shipped to you. Createspace offers a digital proofer that will allow you to see your full book online and approve it for distribution. Once you approve it, it will be immediately available in the Createspace store. You can choose to immediately download a PDF version of your book to proof if you prefer.
You may also order proof copies. Authors may order their books at a reduced rate, but must pay shipping charges. I won’t lie. Createspace takes a while to get copies to you unless you pay for the pricier expedited shipping. There is a page in the back of proof copy book that says “PROOF” in big letters. It will let you see the book in person and verify that looks the way you want it to.
Once you have reviewed your proof copy, you may approve it online and again, it will be immediately available in the Createspace store. It does not matter greatly whether you digitally proof your book or order proof copies. You can do either one. The important thing is to approve your proof once you are satisfied so that your book can go to print.
If you make changes at this point, you will have to resubmit your book to the review process.
Sales Channels
Sales channels are the venues you use to sell your book. Click on “Continue to Sales Channels.” Here, you may opt for Standard Distribution through Amazon, Amazon Europe, and the Createspace store. You may also choose Expanded Distribution, which offers your book to bookstores, libraries, and Createspace Direct. Both options are now free.
Click “Save & Continue.”
Setting Your Price
On the next screen, Createspace will provide you with a minimum list price for your book. Your goal is to set a list price that will give you a royalty return, but not be outside of your customer base’s ability to pay. There are buttons to calculate your royalties based on the prices you submit.
Once you have chosen your prices, click “Save & Continue.”
Next, it will ask you again about your cover finish.
Description and Information
As with your ebook, the description you provide is your selling point for you book. It is perfectly fine to use the same description you used for your ebook. You will be asked to select a BISAC (Book Industry Standards and Communications) category. This is very easy as there are not many categories from which to choose.
You may add an author biography. Select the book’s language and the country of publication. Choose keywords to help a buyer find your book. As with KDP, these keywords may be a short phrase or a word and should be separated by commas. Unlike KDP, Createspace only allows five keywords, so choose wisely. Remember that you should NOT use your name or words included in the title of the book or the description since those will already be searchable.
Choose whether the book continues adult (pornographic, not soft porn or “purple prose”) content. Be sure and read Createspace and Amazon submission guidelines to make certain you know what they accept and what they do not accept.
Check the box to indicate if you have chosen a font larger than 16pt, which is considered “Large Print” for the visually impared. Now click “Save & Continue.”
Publish to Kindle
Createspace will offer you the option to publish your Createspace print book to Kindle. This is your last step in the Createspace process. You may choose to skip this step. It is a VERY easy process to convert your Createspace print book into a Kindle ebook. The biggest complication I have found with it is that the two formats use a different type of table of contents which does not convert over. For that reason, I upload my books separately to KDP and Createspace to make sure the table of contents is correct.
That’s it! You’re done! Be sure and check back on your Member Dashboard from time to time. There is a good bit of useful information about your sales and royalties there.